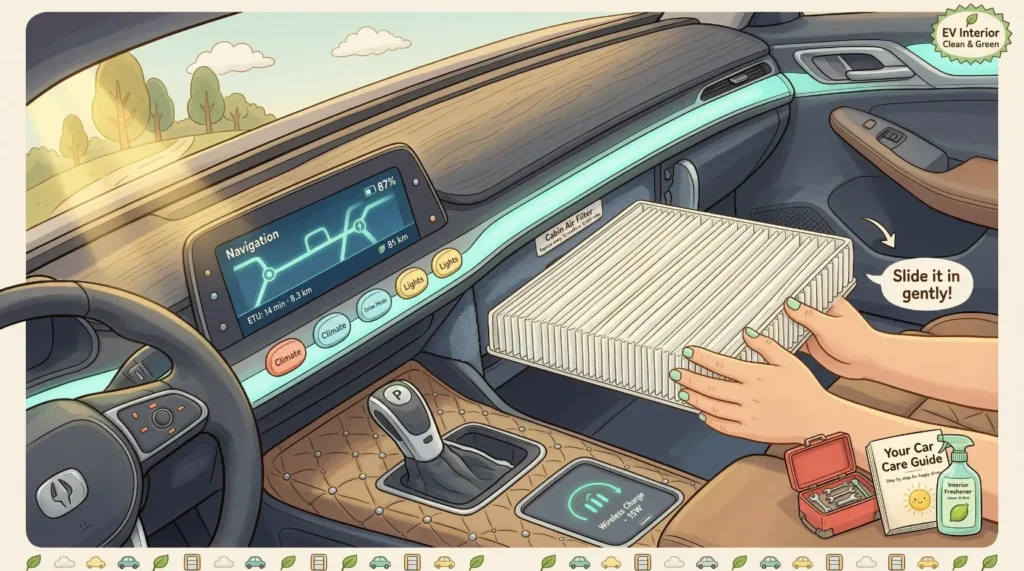
Here’s a thing almost nobody tells you when you buy an electric car: the air you breathe inside the cabin is only as clean as the little folded paper filter hidden behind your glovebox. And most owners forget it even exists — until the AC starts smelling musty, the airflow goes weak, or pollen season turns the commute into a sneeze-fest. 🤧
The good news? This is one of the easiest, cheapest, and most satisfying jobs you can do on an EV. No oil, no grease, no lift, no special training. Just a fresh filter, ten to twenty minutes, and a willingness to crawl into the dashboard a little. Whether you drive a Tesla in Texas or a Tata in Tamil Nadu, learning to replace EV cabin air filter parts yourself can save you real money and seriously upgrade the air you breathe.
⚡ The Short Answer
- Most EVs use a glovebox-mounted cabin filter — pop the glovebox, slide the old one out, slide the new one in. Some sit under the hood or behind a kick panel.
- Replace it every 12,000–15,000 miles (20,000–25,000 km) or once a year — more often in dusty or polluted areas.
- Three main types: standard (particle), activated carbon (odor + gases), and HEPA/PM2.5 (fine particulate). HEPA is a huge upgrade for Indian cities.
- DIY cost is roughly $15–$45 (₹1,000–₹3,500) for the filter. A service center charges 2–4x that in labor.
- Tools needed are minimal — usually just your hands, sometimes a screwdriver or trim tool.
- No high-voltage risk — the cabin filter has nothing to do with the battery pack, so it’s a safe beginner job.
Why Your Cabin Air Filter Actually Matters 🌬️
The cabin air filter is the unsung hero of your climate system. Every time your fan runs — heating, cooling, or just venting — outside air gets pulled through this filter before it reaches your face. It traps dust, pollen, soot, brake particles, mold spores, and (with the right type) odors and exhaust gases from the cars around you.
In an EV, this matters even more than you’d think. EVs are quiet and well-sealed, so people spend long, calm hours inside them. You notice the air. A clogged filter means weaker airflow, a struggling blower motor, foggy windows that won’t clear, and that classic musty “gym sock” smell when you crank the AC.
There’s an efficiency angle too. When the filter is choked with debris, your blower motor has to work harder to push air through it. In a gas car that’s a minor annoyance. In an EV, every extra watt the climate system draws is range you don’t get. A clean filter keeps airflow smooth and the HVAC system efficient — small gains, but they add up over a year of driving.
And then there’s health. For anyone with allergies, asthma, or sensitivity to pollution, the cabin filter is your last line of defense. This is exactly why the decision to replace EV cabin air filter units on schedule isn’t just about comfort — it’s about what you’re breathing for hours every week.
How Often Should You Replace It? 📅
The general rule for most EVs is every 12,000 to 15,000 miles (roughly 20,000 to 25,000 km), or once every 12 months — whichever comes first. That’s a comfortable baseline for clean, suburban driving.
But “whichever comes first” is doing a lot of heavy lifting in that sentence, because your environment changes everything:
- Dusty or rural roads: Every 6–8 months. Unpaved roads and construction dust clog filters fast.
- Heavy-pollution cities (Delhi, Mumbai, Bengaluru, LA basin): Every 6 months, sometimes sooner. PM2.5 and PM10 levels destroy filter life.
- Pollen-heavy regions: Swap before spring if you have allergies.
- Mild, clean climates: The full 12-month interval is usually fine.
A quick honesty check: pull the filter out and look at it. If it’s grey, brown, packed with leaves, or you can’t see light through it, it’s overdue. Filters are cheap; clogged airways and an overworked blower motor are not.
If you want to slot this into a bigger routine, our EV Maintenance Schedule: What to Do and When lays out exactly when to do each job across the year so nothing slips through the cracks.
The Three Filter Types (And Which One You Want) 🔍
Not all cabin filters are equal. When you go to buy one, you’ll face three broad choices — and the right pick depends a lot on where you live.
| Filter Type | Main Benefit | Typical Replace Interval | Illustrative Cost (US / India) |
|---|---|---|---|
| Standard (Particle) | Blocks dust, pollen, large debris | 12 months / 15,000 mi | $12–$20 / ₹800–₹1,500 |
| Activated Carbon | Adds odor + gas/exhaust filtering | 9–12 months / 12,000 mi | $18–$30 / ₹1,200–₹2,200 |
| HEPA / PM2.5 | Captures ultra-fine particles & smog | 6–12 months / 10,000 mi | $30–$55 / ₹2,500–₹4,000 |
Costs are illustrative and vary by model, brand, and region.
Standard particle filters are the basic factory spec. They’re fine for clean air and tight budgets, but they don’t touch smells or microscopic pollution.
Activated carbon filters add a layer of charcoal that absorbs odors, smog, and gases — great if you’re stuck in traffic behind diesel trucks or autorickshaws. This is the sweet-spot upgrade for most people.
HEPA / PM2.5 filters are the gold standard. They trap the tiny PM2.5 particles that penetrate deep into your lungs — the same pollution metric you see on air-quality apps. For anyone driving in a polluted city, this upgrade is genuinely worth the extra money.
Tools & Filter: What You Actually Need 🧰
The beauty of this job is how little gear it demands. For most EVs, your shopping list is short:
- The correct replacement filter — matched to your exact make, model, and year (more on finding the part number below). This is the one thing you cannot improvise.
- A flashlight or your phone’s torch — the filter housing usually lives in a dim corner.
- A small flathead or Phillips screwdriver — only some models need this for clips or a cover.
- A plastic trim tool (optional) — handy if a kick panel or trim piece has to come off; protects against scratches.
- A pair of disposable gloves (optional) — that old filter can be genuinely gross.
That’s it. No jack, no high-voltage gloves, no diagnostic scanner. Because the cabin filter has zero connection to the battery pack or drive system, there’s none of the electrical risk people associate with EV work. This is firmly beginner territory — far simpler than the maintenance EVs don’t need, which we covered in Do EVs Need Oil Changes?.
Step-by-Step: How to Replace EV Cabin Air Filters Yourself 🛠️
Locations vary by model, but the vast majority of EVs put the filter behind or below the glovebox. Some put it under the hood near the windshield (the “cowl” area), and a few hide it behind a kick panel. Here’s the general glovebox process — adjust to whatever your car’s manual shows.
Step 1 — Park, power down, and prep.
Turn the car fully off and open the passenger door for elbow room. Lay down a towel to catch debris. Put on gloves if you’ve got them.
Step 2 — Access the glovebox housing.
Empty the glovebox. Most designs let you squeeze the sides inward to release the stops, then drop the whole box down. Some use a small damper arm you unclip; others have a couple of screws. Go gently — these clips are plastic.
Step 3 — Locate the filter cover.
Behind the lowered glovebox you’ll see a rectangular plastic cover or cassette door, usually held by tabs or clips. Look for a small airflow arrow printed on it — that tells you which way the new filter goes in.
Step 4 — Remove the old filter.
Release the clips and slide the cover off, then pull the old filter straight out. Keep it flat-ish — a year of dust will shake loose otherwise. Notice its orientation before it leaves the housing.
Step 5 — Inspect and clean.
Wipe out any leaves or grit in the empty housing with a cloth. A quick vacuum here never hurts.
Step 6 — Install the new filter.
Match the airflow arrow on the new filter to the direction marked on the housing (usually pointing down, toward the blower). Slide it in fully and seat it flush. Getting the arrow backwards is the single most common DIY mistake — double-check it.
Step 7 — Reassemble.
Snap the cover back on, lift the glovebox into place, and reconnect any clips or screws. Reload your stuff.
Step 8 — Test it.
Start the car, run the fan on high, and enjoy the noticeably stronger, fresher airflow. Done. 🎉
Start to finish, this is usually a 10–20 minute job the first time, and five minutes once you’ve done it before.
Finding Your Filter Location & Part Number 🔎
This is the step that trips people up, so it’s worth slowing down. Buying the wrong filter is the only real way to waste money here.
1. Check the owner’s manual first. It states the exact location and the maintenance interval, and often the OEM part number. The digital manual in the car’s menu works too.
2. Search “[your make] [model] [year] cabin air filter.” Sellers list the correct part by vehicle, and most retailers have a “fits your car” lookup. Cross-check it against your VIN if there’s any doubt.
3. Read the old filter. Many filters have the part number printed right on the cardboard frame. Pull it, photograph it, and match it.
4. Note whether yours takes a single or dual filter. Some EVs (certain Teslas, for example) use two filters side by side. Buy them as a set so you’re not stuck halfway through.
A small but important note: locations genuinely vary by model. Glovebox is most common, but if you pop the box and find nothing, check under the hood at the base of the windshield before assuming the worst — that cowl area is the second-most-common spot.
Upgrading to HEPA for Polluted Cities 🇮🇳
If you live in a city where the air-quality index regularly screams “hazardous,” this section is for you. India’s metros — Delhi, Mumbai, Kolkata, Bengaluru, Pune — face PM2.5 levels that routinely sit many times above WHO safe limits, especially in winter. Your standard factory filter simply isn’t built to stop particles that fine.
This is where a HEPA or PM2.5-grade cabin filter earns its keep. These filters capture the ultra-fine particulate matter that ordinary particle filters let sail straight through — the exact pollution that lodges deep in your lungs. For families with kids, elderly passengers, or anyone with respiratory issues, upgrading is one of the highest-value health moves you can make in a car.
A few real-world tips for polluted-city driving:
- Use recirculation mode in heavy traffic so the filter cleans the same cabin air repeatedly instead of pulling in fresh smog.
- Replace HEPA filters more often — every 6 months in cities like Delhi, because they clog faster precisely because they’re catching more.
- Don’t pair a great filter with leaky door seals. Cabin filtration only works if the cabin is sealed.
Yes, HEPA filters cost more — roughly ₹2,500–₹4,000 ($30–$55) versus a few hundred rupees for basic — but spread over a year of daily commuting, it’s pennies per drive for measurably cleaner air. Honestly, this is the single most underrated EV upgrade in Indian cities, and the reason so many owners now make a point to replace EV cabin air filter units with a HEPA option the very first time.
DIY vs Service Center: The Real Savings 💰
Let’s talk money, because this is where doing it yourself shines.
The filter itself costs the same no matter who installs it. The difference is labor. A dealership or service center will typically charge $60–$150 (₹2,500–₹6,000) total for a cabin filter replacement, and a big chunk of that is paying someone to spend ten minutes behind your glovebox.
Do it yourself and you pay only for the part:
- Standard filter, DIY: ~$15 / ₹1,000
- Standard filter, service center: ~$70 / ₹3,000
- HEPA filter, DIY: ~$45 / ₹3,500
- HEPA filter, service center: ~$130 / ₹5,500
Even on the low end, you’re saving $45–$85 (₹2,000–₹3,500) every single time — and you’ll do this once a year for the life of the car. Over a five-year ownership, that’s potentially hundreds of dollars or many thousands of rupees, for a job that’s genuinely easier than assembling flat-pack furniture.
There’s a bonus too: when you do it yourself, you can choose a better filter than the cheap standard one most shops default to. You control the quality, not just the cost.
📈 2026: Better Cabin Filtration Than Ever
Cabin air has quietly become a selling point, and 2026 models reflect it. More EVs now ship with carbon or HEPA-grade filtration as standard, especially trims sold into Indian and Chinese markets where pollution is top of mind.
We’re also seeing smarter systems: air-quality sensors that automatically switch to recirculation when they detect a pollution spike, in-car AQI displays, and “bioweapon defense”-style high-capacity filtration trickling down from premium models into mainstream EVs. Some brands now push filter-life reminders straight to the infotainment screen, so you stop forgetting the job entirely.
The aftermarket has matured too. PM2.5-rated replacement filters are cheaper and more widely available than they were even two years ago, and antibacterial/antiviral coatings are increasingly common. Net result: replacing your filter is easier, cheaper, and more effective in 2026 — there’s really no excuse to neglect it.
✅ 5 Tips for Cleaner Cabin Air
- Match the filter to your air, not the default. Polluted city? Go HEPA. Lots of odors and traffic? Activated carbon. Don’t auto-buy the cheapest standard one.
- Mind the airflow arrow. Installing a filter backwards kills its efficiency. The arrow points the way air flows — usually downward toward the blower.
- Use recirculation in heavy traffic. It lets your filter scrub the same air instead of constantly pulling in fresh pollution.
- Set a calendar reminder. Tie it to a birthday or New Year so you never forget the annual swap.
- Replace it more often in dusty or polluted areas. When in doubt, pull it and look — a grey, packed filter is telling you it’s time.
🛒 Shop This Post
Here are three things that make this job effortless:
- Premium HEPA / PM2.5 Cabin Air Filter — the big upgrade for city drivers. Catches the fine particulate your factory filter misses. Match it to your model before buying.
- Activated Carbon Cabin Filter (Multi-Pack) — odor and gas filtering at a friendly price; buying a 2-pack covers two years and lowers per-unit cost.
- Plastic Trim & Panel Removal Tool Kit — saves your clips and your knuckles if your model needs a panel popped. Cheap, reusable, and useful for a dozen other jobs.
Disclosure: This post contains affiliate links. If you buy through them, we may earn a small commission at no extra cost to you. It helps keep evsmirror.com running. Thanks for the support! 🙏
🎯 Quick Quiz
Test yourself — which filter should you buy?
-
You drive 40 minutes daily through Delhi winter smog. Best pick?
(Answer: HEPA / PM2.5 — only it stops the fine particulate.) -
The new filter has an arrow on it. What does it tell you?
(Answer: The direction of airflow — match it to the housing, usually pointing down.) -
True or false: replacing your cabin filter requires high-voltage safety gloves.
(Answer: False — it’s completely separate from the battery system.) -
Your filter is grey and packed at 8 months in a dusty area. Wait for the 12-month mark?
(Answer: No — replace it now. Environment beats the calendar.)
📋 Cabin Filter Replacement Checklist
- [ ] Confirmed filter location in owner’s manual (glovebox / cowl / kick panel)
- [ ] Looked up the correct part number for make, model & year
- [ ] Chose the right type (standard / carbon / HEPA)
- [ ] Checked if your EV uses single or dual filters
- [ ] Gathered tools (flashlight, screwdriver, trim tool if needed)
- [ ] Removed old filter, noting its orientation
- [ ] Cleaned out the empty housing
- [ ] Installed new filter with airflow arrow matched correctly
- [ ] Reassembled glovebox / cover fully
- [ ] Tested airflow on high — fresh and strong
- [ ] Set a reminder for the next replacement
🤔 People Also Ask
How do I replace EV cabin air filter parts if I’ve never done it before?
Start by finding the location in your owner’s manual — it’s behind the glovebox on most EVs. Empty the glovebox, drop it down, pop off the filter cover, slide the old filter out, and slide the new one in with the airflow arrow pointing the correct way. It’s a 10–20 minute beginner job with no electrical risk.
How often should I replace an EV cabin air filter?
Every 12,000–15,000 miles (20,000–25,000 km) or once a year for normal conditions. In dusty or heavily polluted areas — think Delhi or Mumbai winters — drop that to every 6 months. When unsure, pull the filter and look; a grey, clogged filter means it’s overdue.
Are HEPA cabin filters worth it?
For polluted cities, absolutely. HEPA and PM2.5-rated filters capture the ultra-fine particles that standard filters miss — the same pollution your AQI app measures. The extra ₹2,000 or $30 works out to pennies per commute for noticeably cleaner, healthier air.
Can a clogged cabin filter reduce my EV’s range?
Slightly, yes. A choked filter forces the blower motor to work harder, drawing extra power from the battery. The bigger effects are weak airflow, foggy windows, and bad smells — but a clean filter does keep your HVAC running efficiently.
Do all EVs have cabin air filters in the glovebox?
No — locations vary by model. The glovebox is most common, but some EVs place the filter under the hood near the windshield (the cowl area) or behind a kick panel. Always check your manual, and if the glovebox comes up empty, check under the hood next.
Is it cheaper to replace the cabin filter myself?
Much cheaper. The filter costs the same either way, but a service center adds $45–$85 (₹2,000–₹3,500) in labor for a ten-minute job. DIY pays only for the part — and lets you choose a better filter than the cheap default shops often install.
🚀 The Bottom Line
Replacing your cabin air filter is the rare car job that’s cheap, quick, low-risk, and genuinely rewarding. You get cleaner air, stronger airflow, a happier HVAC system, and money saved every single year. For drivers in polluted cities, upgrading to HEPA turns a routine swap into a real health upgrade.
So grab the right filter, set aside fifteen minutes this weekend, and learn to replace EV cabin air filter units yourself. Once you’ve done it once, you’ll never pay a service center for it again. 💨
Ready to keep your EV in top shape? Pair this with our full EV Maintenance Schedule: What to Do and When, and if you’re still wondering what EVs don’t need, read Do EVs Need Oil Changes?. Breathe easy and drive clean. ⚡